Setup EgoPay SCI
- Enter your EgoPay account.
- Switch to "MERCHANT" page in top menu.
- If you did not add any websites yet, you have to add one on this page ("Websites").
- Switch to "Stores" page in top submenu.

- Click "Add New" button to create new store:
Store Name - any name
Success URL - set to http://my_program_domain/?a=return_egold&process=yes
Fail URL - set to http://my_program_domain/?a=return_egold&process=no
CallBack URL - set to http://my_program_domain/alertpay_processing.php
For all URLs above - change "my_program_domain" to your site domain. If you are using HTTPS on your site change "http://" to "https://"
leave all checkboxes unchecked

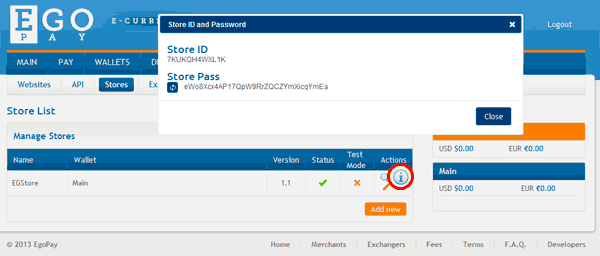
- Save form and wait for next page where you should see your Stores list.
- In the list click on "i" icon, next to your store - you will see popup with your Store ID and Store Pass
- Enter HYIP Manager Pro admin panel Settings page and copy/paste your EgoPay's Store ID and Pass to the script settings:
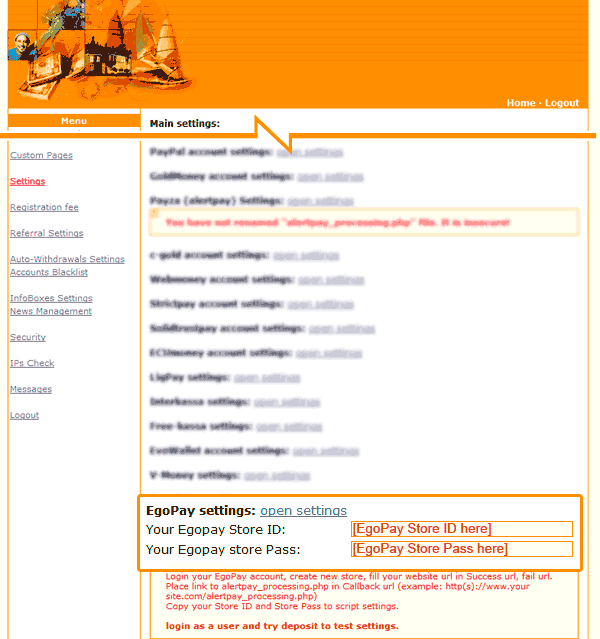
- Do not forget save Settings.
- Create test user account and make deposit via EgoPay to test your settings.
Setup EgoPay API
- Enter your EgoPay account.
- Switch to "MERCHANT" page in top menu.
- If you did not add any websites yet, you have to add one on this page ("Websites").
- Switch to "API" page in top submenu.
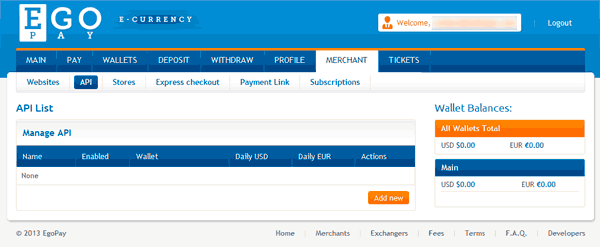
- Click "Add New" button to create new API:
API Name - any name
check boxes next to Enabled, Transfer (to enable payments), Balance (to enable API test)
Optionally for more security you can set your server outgoing IP to "Requesting IP" field. Get your server outgoing IP from your hoster.

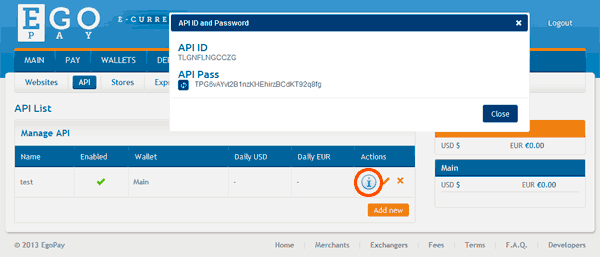
- Save form and wait for next page where you should see your API list.
- In the list click on "i" icon, next to your store - you will see popup with your API ID and API Pass
- Enter HYIP Manger Pro admin panel Auto-Withdrawals Settings page and setup EgoPay API:
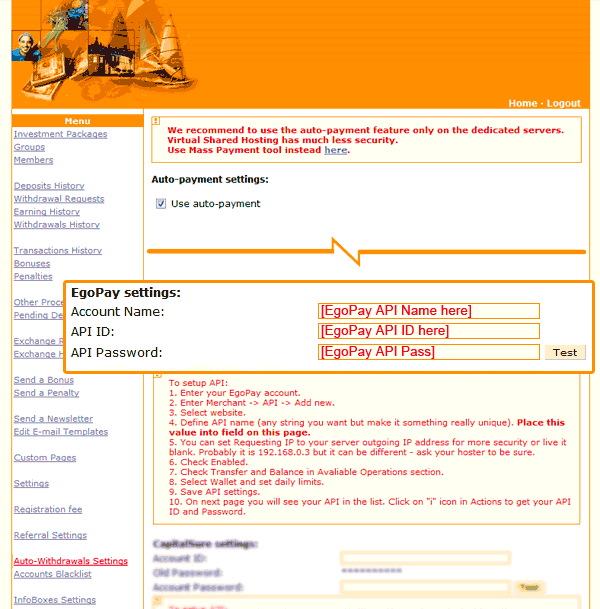
After you enter all required data you can click on "Test" button, to use script access EgoPay API and get your balance. If data you have entered is valid and you setup API in your account correcly, you will see your USD balance. - Do not forget save Settings.